Reply
Honored Contributor
Posts: 13,067
Registered: ‎01-16-2015

@RespectLife wrote:

Hmmm @ChiliPepper 


While I LOVE Cheeseburger soup, I dunno about a Cheeseburger Cocktail!   ha ha


@RespectLife 


Almost time to make that soup!!!

Honored Contributor
Posts: 14,765
Registered: ‎02-27-2012

I'll say @ChiliPepper 


It is 52 degrees out right now!!!

Honored Contributor
Posts: 13,067
Registered: ‎01-16-2015

NATIONAL FRIED RICE DAY | September 20

Honored Contributor
Posts: 13,067
Registered: ‎01-16-2015

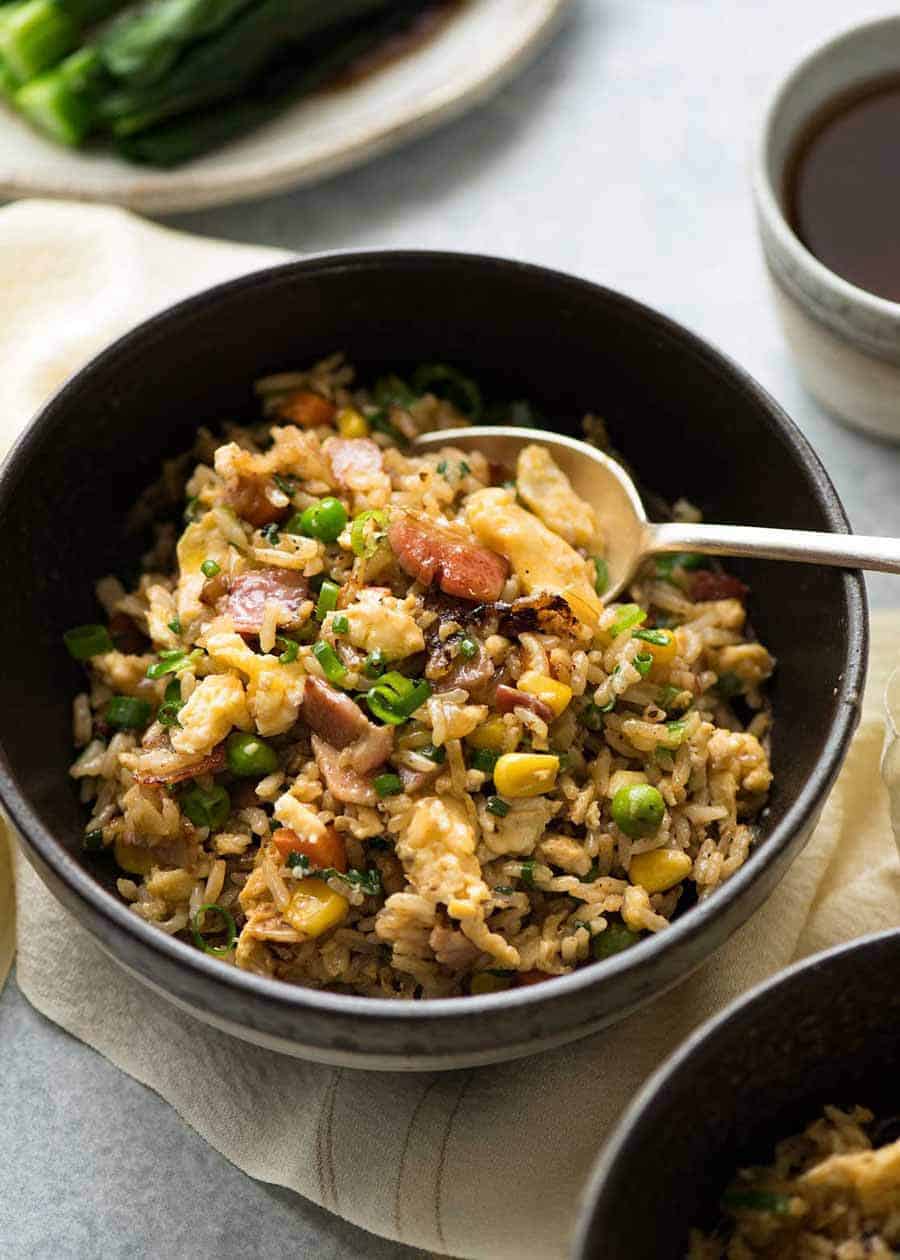
Close up of Egg Fried Rice in a dark brown bowl, ready to be eaten


Fried Rice

 
Fried rice is a side that goes with all Chinese and Asian foods!
This one truly stacks up to your favourite Chinese restaurant, a reader favourite. See notes for scaling recipe up and using skillet instead of wok, and for GF option.
 
Don't have day old rice? No worries. Make this reader-favourite Emergency Baked Fried Rice instead.
 
Prep Time: minutes 
Cook Time: 10 minutes 
Total Time: 15 minutes 


Servings: 2 - 3 people


 Author: Nagi


Ingredients

  • 2 tbsp oil
  • 1/2 onion , finely chopped
  • 2 garlic cloves , minced
  • 120 g/4 oz bacon , chopped (optional, or use ham)
  • 1 - 1 1/2 cups diced vegetables , frozen or fresh (Note 1)
  • 2 cups (packed) cooked day old white rice (refrigerated or frozen defrosted, Note 2)
  • 3 eggs, whisked
  • 3/4 cup green onions , (shallots / scallions) sliced

Sauce:

  • 1 tbsp Chinese cooking wine (sub Mirin, cooking sake or dry sherry) (Note 4)
  • 1 tbsp Oyster Sauce
  • 1 tbsp light soy sauce (or all purpose) (Note 5)
  • 1 tsp sesame oil , optional
  • 1/4 tsp white pepper

Instructions

  • Heat oil - Heat about 1 1/2 tbsp oil in a wok or 2 tbsp oil in a skillet over high heat until smoking.
  • Add onion, garlic and bacon. Cook until bacon is light golden - about 1 1/2 minutes.
  • Add vegetables (still frozen is fine). Cook for 2 minutes so they defrost and water evaporates.
  • Add rice and Sauce ingredients. Cook for 1 1/2 minutes until liquid evaporates.
  • Scramble egg - Shove rice to the side of the wok / skillet. Add 1/2 tbsp oil into the cleared space, shift wok so the heat is centred over the cleared space. Pour in egg then scramble - cook it through properly, don't "soft scramble".
  • Serve - Add green onion then stir the egg into the rice. Remove from heat and serve immediately!

Notes

1. Vegetables - I used peas, corn, carrots frozen (no need to thaw). Use 2 cups of any vegetables you want. Dice firm vegetables like carrots. For leafy things like Asian greens, chop the stems into small bite size pieces, and chop the leaves into 2.5cm/1" pieces (they will wilt).
 
2. Cold, day old rice - You need day old rice that's been refrigerated or frozen (then thawed) because the rice grains dry out, making them ideal for fried rice. Sticky freshly cooked rice is no good for fried rice - it makes fried rice gluey. Long grain white rice is best for Chinese fried rice. But any cooked, cold rice will be fine - white or brown.
 
Don't have day old rice? Make this reader-favourite Emergency Baked Fried Rice instead!
 
3. Chinese cooking wine or Mirin (or cooking sake or dry sherry) is an essential ingredient for making a truly "restaurant standard" fried rice. Though many recipes suggest using liquid chicken broth, please do not do this - it makes your fried rice wet and gluey!
 
If you can't consume alcohol, adjust recipe as follows: Reduce oyster and soy sauce to 2 tsp each, and add 1 tbsp water to the Sauce. Proceed with recipe. When you add the rice, add 1/2 tsp chicken or vegetable stock powder (or bouillon cube crumbled). Stir through, then add remaining Sauce ingredients exc the Cooking wine. Proceed with recipe, add tiny sprinkle of salt at end if you want it saltier.
 
4. Soy sauce - Any soy sauce is fine here (but not sweet or flavoured). Light and all-purpose soy keeps the fried rice a light colour like you get at Chinese restaurants. Dark soy will stain the rice a mahogany colour which is also appealing, and the rice will have a stronger soy flavour which many people enjoy!
 
5. SKILLET: If using a skillet, add about 1/2 tbsp extra oil at the start to compensate for larger cooking surface. Also, if you use a large skillet, you can scale up the recipe by 50% - click on the Servings number and slide the scaler until the rice becomes 3 cups, it will change all the ingredients. Once you add the rice, use 2 wooden spoons to toss it - makes up for not having the high walls of a wok.
 
6. GLUTEN FREE: Make sure you use gluten free soy sauce and Oyster Sauce if you want to make this gluten free. 
 
7. Nutrition per serving, assuming 3 servings. I find that this is sufficient for a meal - and no one has ever accused me of eating like a bird!

Nutrition

Serving: 315g | Calories: 522cal
Honored Contributor
Posts: 13,067
Registered: ‎01-16-2015

NATIONAL STRING CHEESE DAY | September 20

Honored Contributor
Posts: 13,067
Registered: ‎01-16-2015

Re: Quick Pot Sticker Soup

[ Edited ]

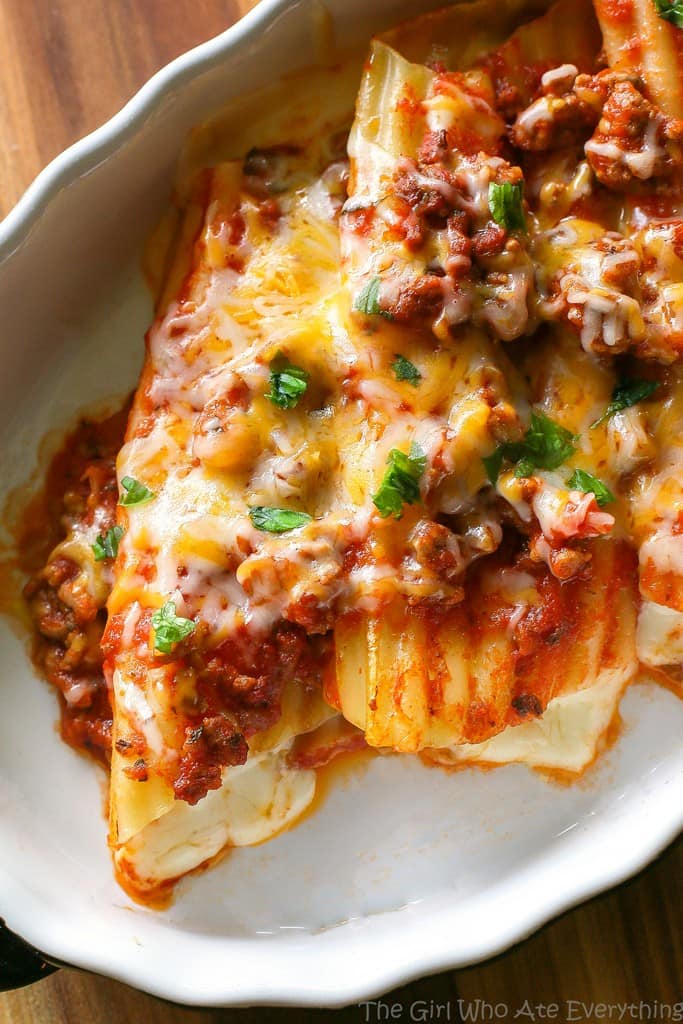
String Cheese Manicotti


STRING CHEESE MANICOTTI

 
This String Cheese Manicotti is stuffed with string cheese for a super easy weeknight meal. My kids loved it!
 
Prep time: 15 minutes
Cook time: 25 minutes
 
 Servings: 6
 

INGREDIENTS

 
  • 1 package, (8 ounces) manicotti shells
  • 1 pound ground beef
  • 1/2 cup finely chopped onion
  • 1 garlic clove, minced
  • 1 jar, (24 ounces) spaghetti sauce
  • 12 pieces string cheese
  • 1-1/2 cups (6 ounces) shredded part-skim mozzarella cheese
  • grated Parmesan cheese
  • (optional) basil, chopped
  •  

INSTRUCTIONS


  • Cook manicotti according to package directions in salted water.
  • While pasta is cooking, cook beef and onion over medium heat in a large skillet until meat is no longer pink; add garlic and cook for about 1 minute. Drain meat. Stir in spaghetti sauce. Spread half of the meat sauce into a greased 9x13 inch baking dish.
  • Drain manicotti. Stuff each shell with a piece of string cheese. You could even use 2 pieces of string cheese but we thought one was plenty once it melted. Arrange manicotti over meat sauce. Place over meat sauce; top with remaining sauce. Cover with foil and bake at 350° for 25-30 minutes or until heated through.
  • Uncover and sprinkle with mozzarella cheese and bake for 5 minutes or until the cheese is melted. Sprinkle with grated parmesan cheese and garnish with basil if desired.
 
Honored Contributor
Posts: 14,765
Registered: ‎02-27-2012

Re: Quick Pot Sticker Soup

[ Edited ]

@ChiliPepper wrote:

NATIONAL STRING CHEESE DAY | September 20


Ha ha


National String Cheese Day even made our Radio news....along with a little blurb about the guy that invented it....1976 or 1979....can't remember but a lot later than I thought!


@ChiliPepper 

Honored Contributor
Posts: 14,765
Registered: ‎02-27-2012

Oh gosh, @ChiliPepper ....I can't remember if I tried stuffing manicotti w/ string cheese....I know I stuffed somebody w/ string cheese.....didn't melt as good as I wanted.


Rats!  Can't remember


Manicotti is a PILL to stuff!  This would be so much easier !

Honored Contributor
Posts: 14,765
Registered: ‎02-27-2012

Maybe it was this?


Cheese Stuffed Crescent Rolls {In Air Fryer}

Yield: 8            Prep Time: 5 minutes              Cook Time: 6 minutes             Total Time: 11 minutes

These cheesy garlic crescent rolls are ready to eat in 10 minutes! They are a great appetizer or side dish to serve with your meal with hardly any clean up. Stuffed with cheese and coated in garlic butter .


Ingredients

  • 1 tube crescent roll dough
  • 4 string cheese
  • ¼ cup melted butter
  • 2 teaspoons garlic powder
  • 1 teaspoon onion powder
  • ½ teaspoon salt
  • Fresh minced parsley, for garnish

Instructions

  1. Unroll the crescent dough and separate the triangles of dough.
  2. Slice each cheese stick in half.
  3. Place one half string cheese at the wide end of the crescent dough. Fold the ends in and the top over and roll up the dough, being sure to completely seal in the cheese. Repeat with remaining dough.
  4. Stir together the butter, garlic powder, onion powder, and salt.
  5. Brush the butter over all sides of the crescent dough. Reserve any leftover butter for brushing on after cooking.
  6. Place the crescent rolls in an even layer in an air fryer basket. You may have to work in batches, depending on the size of your air fryer.
  7. Air fry at 350 degrees for 6 minutes or until golden brown. 
  8. Brush with remaining butter and sprinkle with parsley before serving.

Notes

These are best served hot, while the cheese is still melted and gooey.

Honored Contributor
Posts: 13,067
Registered: ‎01-16-2015

@RespectLife 


YUM & EASY!!!


Throw a slice of ham in there & you have a meal!