


Stay in Touch
Get sneak previews of special offers & upcoming events delivered to your inbox.
Sign in
Hello again. Let's you and I build a workbench together that you can use in your garage or home workshop. The entire project should cost less than $100 to build and can be accomplished in just a few hours. It is my latest project in my "Do it Yourself with Dan" series. Take the time to watch the included video because it will give you a good head start on what we will be working towards.
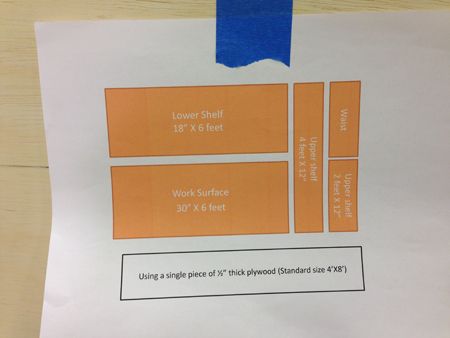
Your shopping list is comprised of (15) 8 foot 2x4's......a single sheet of 4'X8' ply wood, (I recommend 1/2 thickness).......some 3 inch decking screws and some 1 and 5/8 inch wood screws.

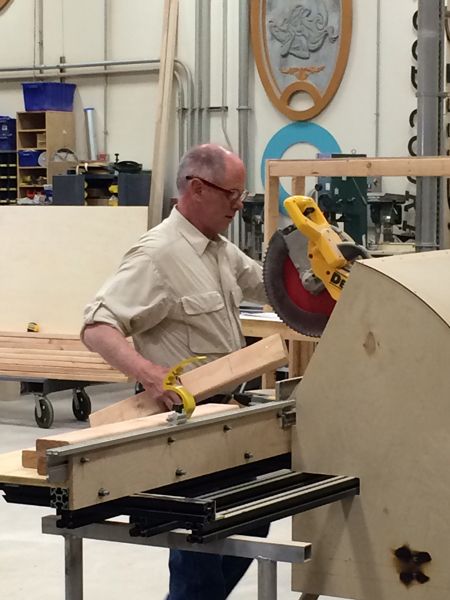
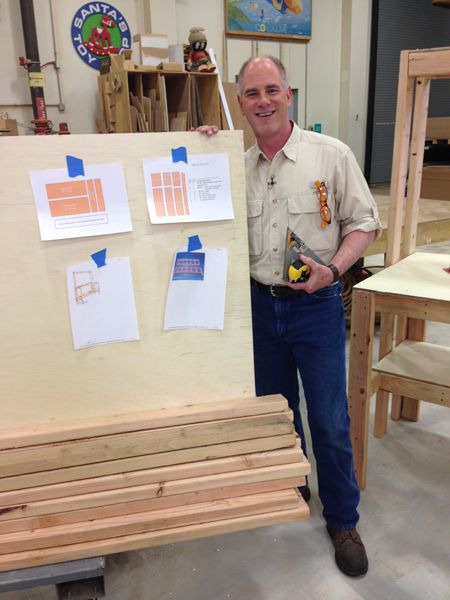
I always start a project by making a cutting list or all lumber and I have included my list for you here. The list makes it easy to get all your cutting done at one time and speeds up the process. Remember to measure twice and cut once to minimize any waist.
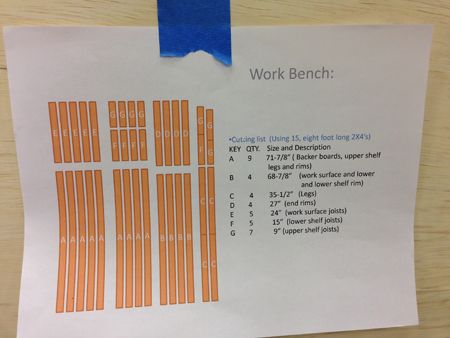
Take the time to label each piece of lumber as you cut it and then we can begin the assembly.
I have marked mine with the corresponding letters A-G that you will find on the "cutting list".
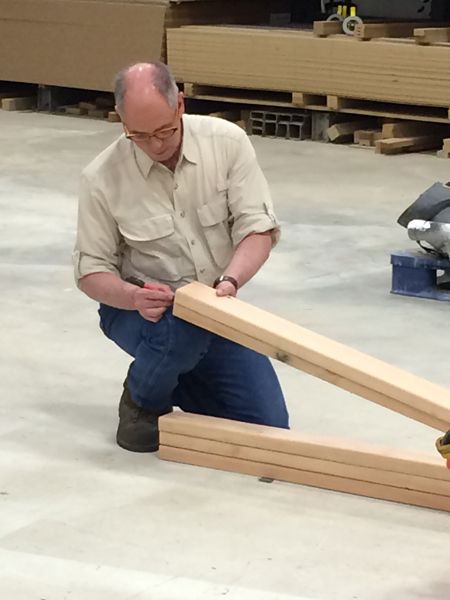
We will start by building the frame work for the bench top.
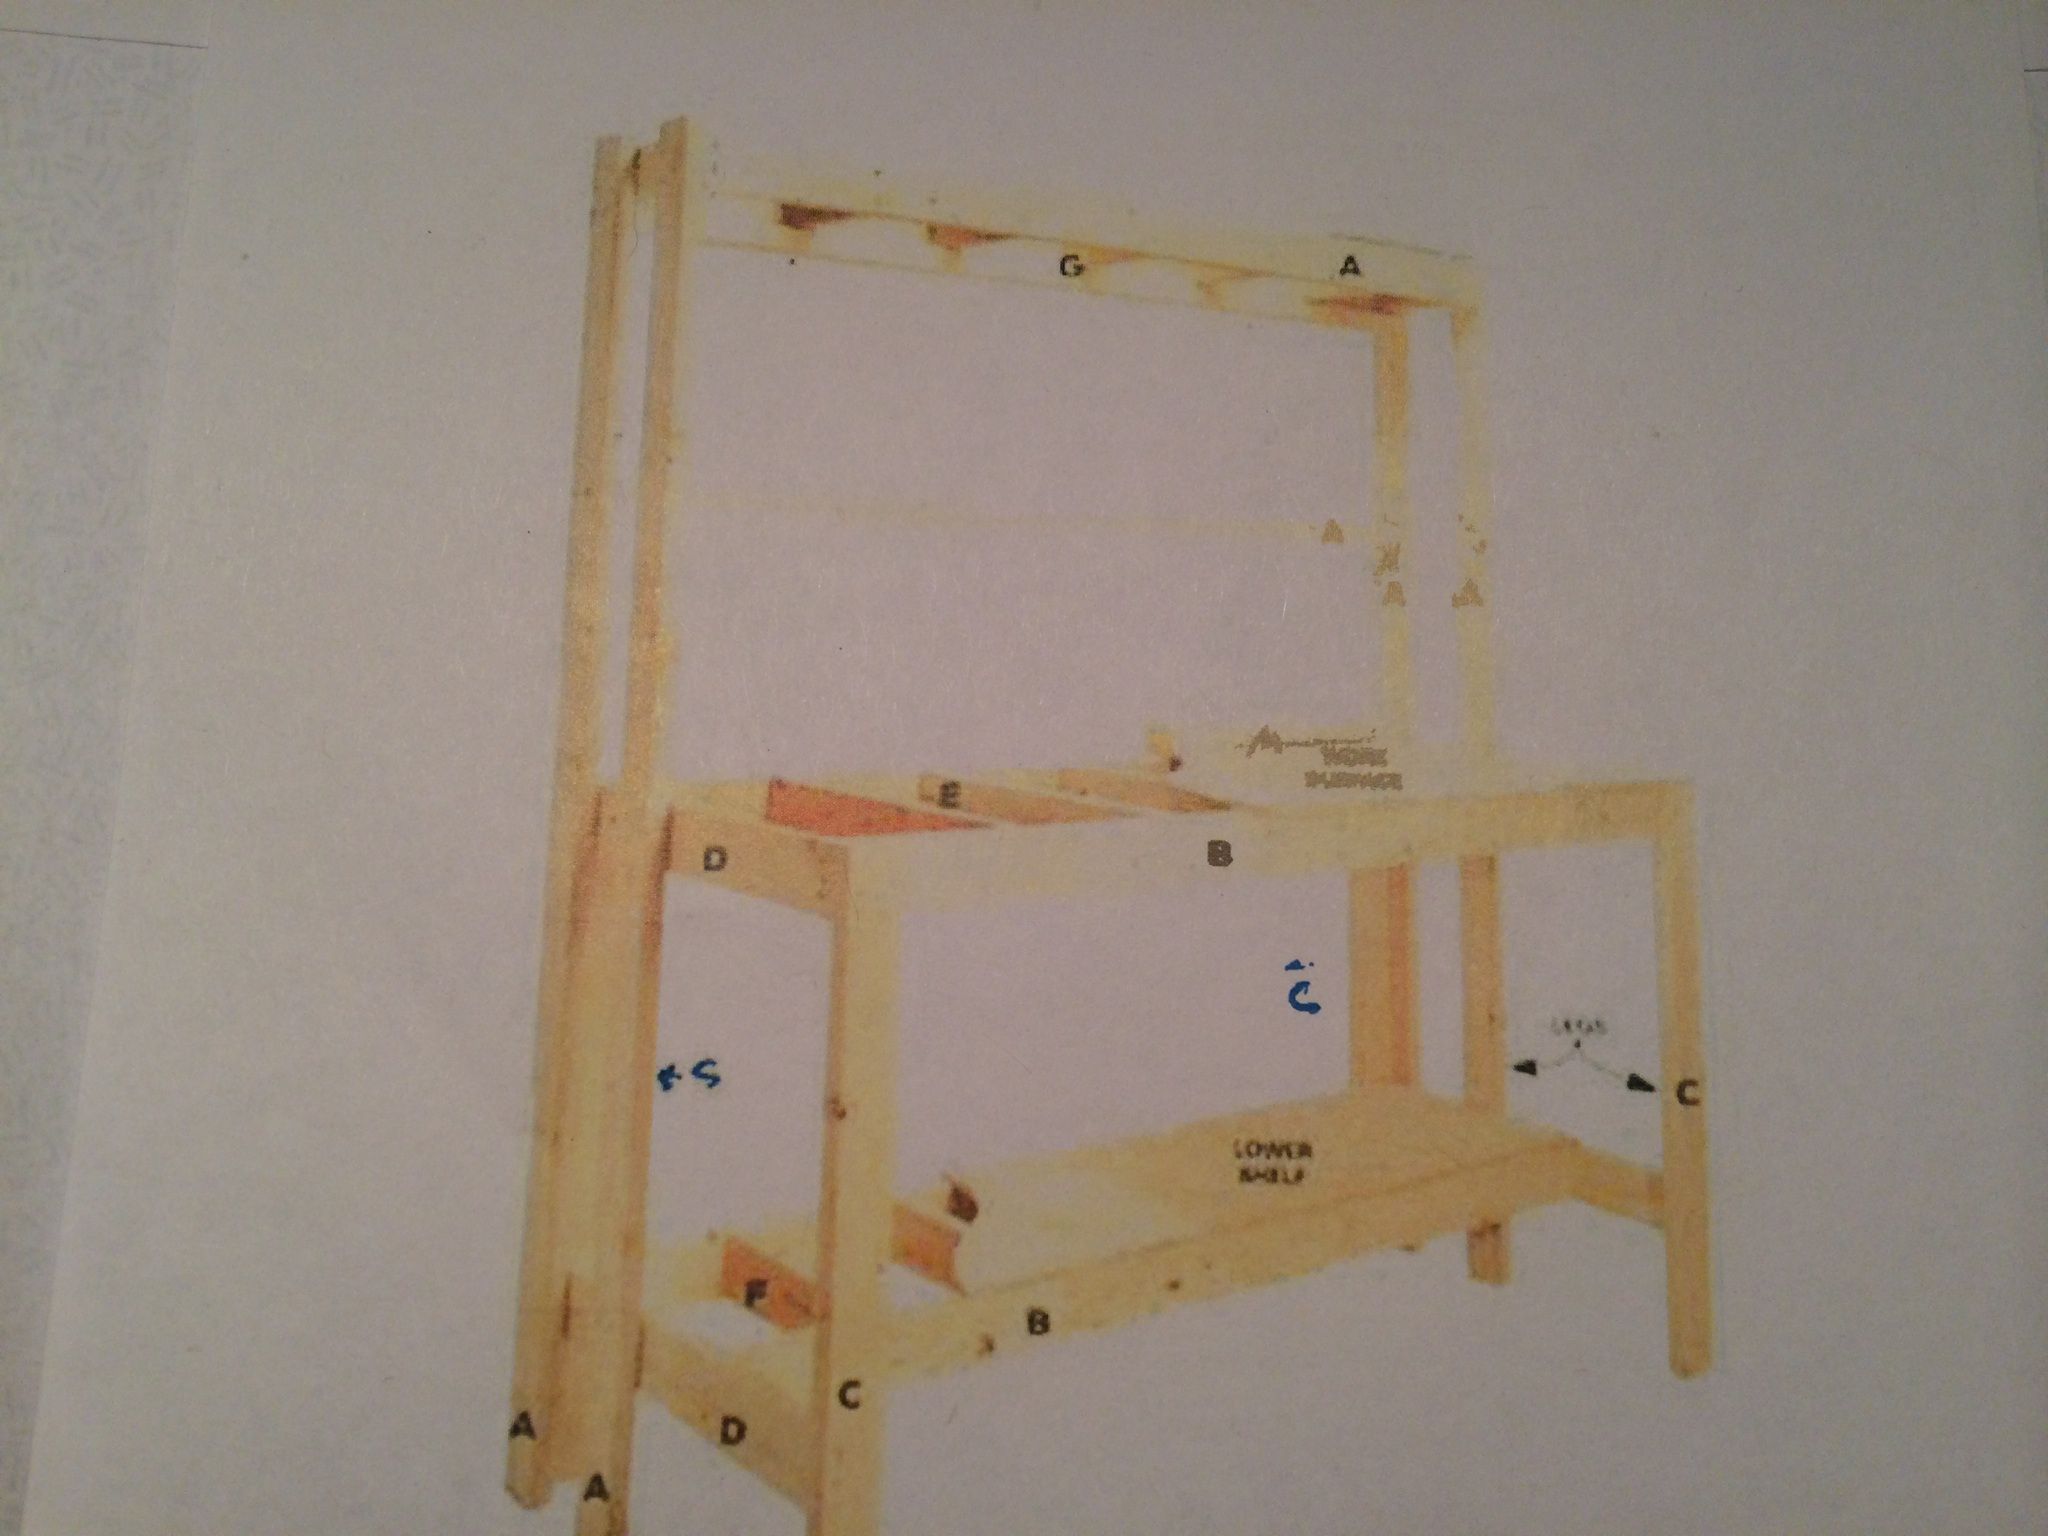
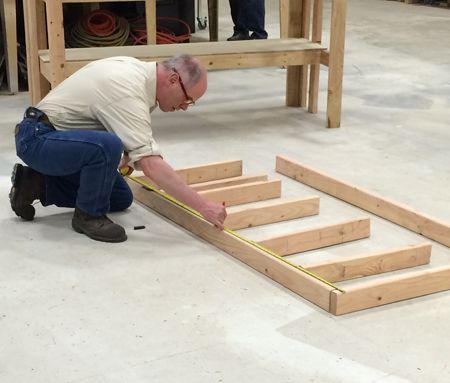
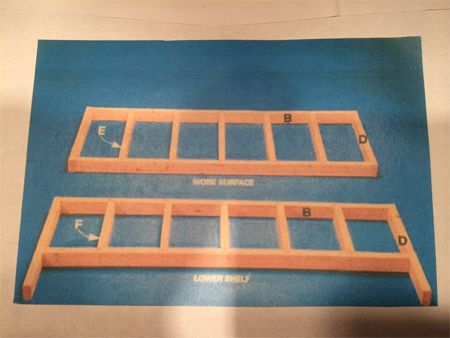
Take the time to square up your work as you use the 3 inch decking screw to create your support frames. Each framing member on the inside of the frame is measure at one foot increments and measured from the middle of the outer support (D) to the middle of each inner support (E). Ok wow..that sounded really confusing but don't let it bother you...just get it close because it will all be covered by the plywood later.
Now repeat the process for the lower shelf assembly. Projects like this should be fun don't let yourself get too worried about perfection like I do, you will only make yourself crazy and take the fun out of it.
Now let's cut your plywood for the bench top and shelf tops. A circular saw works well for this part of our project.
Now attach the legs (parts lettered "C" on your cut list) ...... and then attach the shelf frame that you just assembled...you get to pick the height from the floor to the bottom of this shelf.
Attach your plywood to the bench top and bottom shelf with 1 5/8" screws and were almost there.

The rest of project just follows by attaching your side supports (Part A's)..and attaching your top shelf support frame built just like the first two. Cover it with the last two pieces of plywood and screw in place with additional 1-5/8" wood screws. If you decide you don't want or need a top shelf than that's ok to it is all up to you. The remaining lumber is there for additional supports (Parts marked as "A" in the cutting list.)..and they are there for additional support for the back of the work bench to attach peg board for hanging tools. You may or may not decide to do that and that choice is up to you as well.
It sounds confusing but YES you can build this and it will become the platform for many other rewarding home projects you can build in the future.
Enjoy the process and feel good that you made it yourself. More projects to come...the next one is how to frame out that flat screen TV you purchased and make it a part of your home décor...and the next one is really simple to accomplish!
You can find me on Facebook at: www.facebook.com/DanHughesQVC
Twitter: www.twitter.com/danhughesqvc
You must be a registered user to add a comment. If you've already registered, sign in. Otherwise, register and sign in.


Get sneak previews of special offers & upcoming events delivered to your inbox.
*You're signing up to receive QVC promotional email.
Find recent orders, do a return or exchange, create a Wish List & more.


Privacy StatementGeneral Terms of Use
QVC is not responsible for the availability, content, security, policies, or practices of the above referenced third-party linked sites nor liable for statements, claims, opinions, or representations contained therein. QVC's Privacy Statement does not apply to these third-party web sites.
© 1995-2024 QVC, Inc. All rights reserved. | QVC, Q and the Q logo are registered service marks of ER Marks, Inc. 888-345-5788